Category Archives: Pest Management

Get ready for Garlic!

As fall approaches, it’s time to start thinking about planting garlic. Garlic bulbs, for those who’ve never grown them before, are grown from garlic cloves. As they grow, they divide and create more cloves, growing into full bulbs by harvest time. In Canada, we plant garlic in the fall, allow it to overwinter, and harvest it in the spring and summer.

Like any crop, once you learn a bit about garlic you realize the great diversity within garlic varieties.  The first factor is whether it is a hardneck type, with a hard central core surrounded by one or two layers of cloves, or softneck, which has a flexible stem perfect for braiding. Generally speaking, hardneck is better suited to cold climates, and softneck to regions with mild winters.  Both types come in a huge array of varieties, with varying flavour strength, number of bulbs, and storability. Some examples are listed below and for more detail check out this site.

Variety    Storability Cloves      Flavour  Comments
Ukrainian    Very good   8-12 Hot For the spicy food lovers
Tibetan    Excellent   4-8 Mild and rich Yummy, yummy, yummy
Korean    Very good   8-12 Medium Long fat cloves.Hits the roof of the mouth
Russian    Very good   3-6 Mild and full Large cloves = less peeling
Persian    Outstanding   10-14 Spicy Each pointed clove has red stripes
Italian   Very good   8-12 Mild,flavourful Vibrant flavour
Sicilian   Very good   12-16 Mild Most cloves per bulb make it a great choice for growers

from www.thecuttingveg.com/global-garlic/varieties-available.html

When planting, use the largest cloves for plants whose bulbs you plan to harvest, as the size of the clove directly influences the size of the bulb. Save the smaller bulbs too, and plant them elsewhere to be harvested for their greens, which can be used like chives.

To plant, choose a spot that gets plenty of sun and compost the bed well. Plant cloves 2 to 4 inches deep and about 4 to 8 inches apart. In cold climates, like Canada, it’s good to insulate the bed with up to 6 inches of dry leaves, grass or straw. In spring the foliage will grow quickly, and once about half the foliage has turned brown the bulbs are ready to be harvested.

When harvesting, it is best to pitchfork or dig up the bulbs rather than pulling them up from the leaves. This prevents the bulbs from becoming damaged, which will shorten their storage life. To store, hang the bulbs to dry in a covered location with good air circulation. The bulbs can easily become sunburnt, so sun-drying is not recommended.

For those of you who aren’t great fans of garlic in the culinary sense, it is still an invaluable plant for your garden. Garlic and other members of the onion family repel the majority of garden pests, including borers, mites, spiders and underground pests like root maggots. It also encourages growth in plants like beets and roses, and prevents a variety of diseases, including black spot and mildew. Garlic is said to inhibit growth in legumes, however, so try to keep it away from your peas and beans. 

Garlic bulbs can be chopped and steeped in water to create a variety of organic pest sprays as well, and repellents for squirrels, cats, and dogs. Additionally, garlic has many  medicinal uses. It has been shown to be an excellent immune booster and is known for its anti-fungal and anti-bacterial properties, making it an excellent natural remedy for a whole host of ailments.

If you’d like to start growing garlic, these are two great Canadian suppliers. You can also try planting cloves from leftover organic bulbs you have in the kitchen, but if you want to be sure of a good harvest, try these links:

Boundary Garlic Farm  – British Columbia

The Cutting Veg – Toronto

Leave a comment

Filed under Animal Pests, Companion Planting, Heritage Plants, Pest Management, Plant Diseases, Toronto Organizations

Cuba: An Urban Agriculture Utopia?

Urban Agriculture in Havana

In 2009 I was lucky enough to participate in a three-week sustainable agriculture tour in Cuba organized through the University of British Columbia by a woman named Wendy Holm. Wendy is a dynamo who has been running tours to Cuba for Canadian students and farmers since 1999, facilitating the exchange of information about techniques for growing food and raising livestock without chemical inputs. 

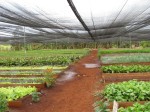
Growing greens under a shade cloth

Cuba is a country of special focus for people interested in sustainable agriculture because it has developed an extensive and innovative system of food production that is not dependant on oil – a fact made more impressive when you consider that oil is used not only to power vehicles, but as the base ingredient in most fertilizers, pesticides and herbicides used in Canada and the US. This system developed following the fall of the Soviet Empire. Due to the US embargo, the USSR had been Cuba’s major trading partner for many years and the source of oil for their industrialized agriculture. Once the USSR collapsed, Cuba was left without an oil supply and without a system for importing food in place. 

Urban Medicinal Plant Garden

This plunged the country into a time called the “Special Period” wherein Cuba had to completely redesign their system for producing and distributing goods, moving people, and feeding its citizens. The government turned much of the state owned land in and around cities over to agriculture which, by virtue of the lack of imports, had to be done following organic principles, without chemical fertilizers, herbicides, or pesticides. Backyard gardening was also strongly promoted, and supported by governmental agricultural extension agents who were dispatched to farms in the cities and countryside to educate and build connections between growers. The result of this is that Cuba is home to one of the most highly developed systems of sustainable agriculture in the world, and is a country which many look to as a model for how we will deal with the upcoming oil shortages of the future, or “Peak Oil”. 

Horses grazing a mango orchard

My 3 weeks in Cuba allowed me to learn a great deal about this fascinating country and its remarkable transition away from oil dependency, especially in light of its unique geopolitical situation. We travelled to urban and rural farms, growing crops for domestic consumption and export. What was fascinating to see was the level of thought put into each aspect of the agricultural system there, both on individual farms, and in terms of the governmental support structure. 

Large Scale Worm Composting

Farms in Cuba all had extensive composting systems, many including vermicomposting beds up to 100 feet long. They produced compost for their plants as well as worm leachate which was used as a pest repellent. Every farm utilized a variety of techniques for pest control, from organic sprays and companion planting of repellent plants, to a variety

Composting: Greens, Sawdust, and Cachaza (sugar cane)

of traps. Scent traps, to hide the odour of a pest’s target plant, and colour traps, yellow or blue plastic (depending on the colour of the pest’s target plant) distributed throughout the garden on stakes and covered with a sticky substance to catch insects. Another common practice was pasturing animals in orchards, allowing them to graze on grass and weeds growing between the trees. This meant the animals were fed, the trees were fertilized and the weeds were suppressed with no real effort from the farmer. 

Using Sunflower as a trap crop for aphids

The importance of governmental support in Cuba cannot be underemphasized. It was the governmental extension agents who disseminated this information among farmers and the government-funded research stations and schools that developed and researched things like tabaquina, a pesticidal spray made of residue from tobacco processing, and mycorrhiza, fungi which grow on plant roots and improve the plant’s ability to absorb water and nutrients from the soil. The amount of land under governmental control was also a decisive factor in the success of urban agriculture in Cuba, as they had huge areas of unoccupied urban land available to be turned over to food production, something that would be impossible with the private landownership in Canada and the US. This vast area under cultivation allows Havana to produce 90% of its fruit and vegetable requirements to be produced within the city’s borders (although, before you’re too impressed by this statistic, keep in mind that the most common meal in Cuba is 

Medicinal Uses of Fruits - Posted at a market

rice, beans and pork, with vegetables playing a minor role in the country’s food culture). In addition, governmental control of markets assists farmers in planning and distributing their crops for the season, and educating the public about the medicinal and health benefits of various agricultural products. 

Regardless of the fact that the Cuban climate and political structure are very different from our own, there is a lot to be learned from this country, in terms of techniques for growing, systems for supporting farmers, and the wide range of cooperative farming systems seen throughout the country, which I will discuss further in a future post. If you are interested in learning more about Cuba and its experience with “Peak Oil” and sustainable agriculture, check out the links below. 

Very Urban Agriculture

Wendy Holm’s Website 

 Student Cuban Agricultural Tour Course Site 

The Power of Community: Film on Cuba’s Experience with Peak Oil 

Sustainable Agriculture and Resistance, Transforming Food Production in Cuba, 2002, Fernando Funes, et al.

3 Comments

Filed under Companion Planting, Composting, Food Security, International Agriculture, Pest Management, Weeds

Biodynamics, Permaculture, and Square Foot Gardening

Last week at the garden we had a brief discussion of some more “unconventional” approaches to growing food. We focused on three techniques, biodynamic farming, permaculture, and square foot gardening. These are three approaches with a lot of interesting information, and for gardeners not looking for a whole new framework to adhere to, they can be useful as a way to see your garden’s potential with new eyes. Permaculture and square foot gardening, specifically offer a great deal of creative ideas and freedom for the gardener, and once you start thinking of things in these ways it can lead to more and more innovation.

Biodynamic Farming: A method started in 1924 by Rudolph Steiner (also known for his involvement in developing the Waldorf School method) which treats the farm as an organism unto itself wherein the lifecycles of plants and animals create no external outputs and  require no external inputs; it is a holistic closed-loop system. Some aspects of biodynamics are familiar to the average sustainable gardener, while others seem much more spiritual and esoteric.Generally though, farms which observe biodynamic practices, however unconventional, enjoy increased yields and soil health, so it is a compelling body of work.

One important aspect of Biodynamics (used by non Biodynamic farmers as well), is planting with the phases of the moon. The idea is that in the same way the moon pulls the tides, it pulls smaller bodies of water as well, making ground water closer to the surface. The four phases of the moon are related to different aspects of plant growth:
 

New moon – Balanced leaf and root growth. Plant and transplant above ground annuals that produce seeds outside the fruit. Plant short and extra-long germinating seeds
Second Quarter – Increased leaf growth. Plant and transplant above ground annuals that form seeds inside the fruit. Mow lawns for increased growth.
Full Moon – Increased root growth. Plant long germinating (two weeks) seeds, bulbs, biennials, perennials and root crops that need stimulated root growth. A good time for transplanting, pruning, and harvesting fruits for storage and drying. Mow lawns to slow.
Fourth Quarter – Resting period. Neither root nor leaf are active. Harvest, cultivate, prone destroy pests and weeds, harvest for storage and herbs for drying. Start compost piles.

The astrological sign the moon is travelling through changes every few days, and also exerts an impact on plant growth. Water signs (Cancer, Scorpio, and Pisces) are fertile and beneficial to many plants, root crops like earth signs ( Taurus, Virgo, and Capricorn) and flowers thrive in Libra. Fire signs (Aries, Leo and Sagittarius) and remaining air signs (Gemini and Aquarius) are barren and dry, and better for cultivating, harvesting, and controlling weeds and pests. Ideally, crops should be planted in the optimal moon phase and zodiac sign to promote their specific growth. For example, carrots or beets would do best planted when the moon is full and in Capricorn.Gardening by the moon calendars are available, and more in depth information can be found at www.gardeningbythemoon.com

Another aspect of biodynamics is the nine different soil preparations used to enhance soil fertility. These preparations include two different humus-creating techniques (filling a cow horn with manure or ground quartz and burying it from autumn to spring), and seven compost  enhancing techniques which involve adding herbs such as yarrow,  camomile and stinging nettle to compost in homeopathic doses.

Whether or not it can be made clear if biodynamic practices are substantially better than other organic approaches, biodynamic farming is gaining adherents, and has an international certification organization called Demeter, whose label you may have seen on health food products.

Permaculture: Developed by two Australians, Bill Mollison and David Holmgren in the 1970’s, permaculture is a combination of “permanent agriculture” or “permanent culture” and is a technique of designing agricultural areas as ecosystems which minimize work by overlapping functions. Rather than the division of crops and animals, wastes and inputs, seen in conventional agriculture, permaculture focuses on the integration and interconnectedness of life on the farm; using crop waste to feed animals and animal waste to feed crops instead of purchasing feed and fertilizer and discarding manure and plant litter.

Modeled after nature, permaculture believes that every aspect of the farm should serve more than one function and every needed function should be accomplished by more than one aspect of the farm. For example, rather than making garden paths out of compacted soil, they should be made from think layers of sawdust poured into trenches. The sawdust serves multiple functions by not only acting as a path, but also storing water runoff underground, recycling a potential waste product, and decomposing underground to later be incorporated into the compost. These same functions should also be performed by other parts of the farm or garden, by having cisterns or swales to collect water and other compost generating materials onsite.

The 12 principles of permaculture focus on working with nature in a variety of compelling ways. Guilds, for example, are groups of plants which grow symbiotically together, such as the well-known example of corn, beans and squash. Permaculture identifies many other guilds combining plants that require shade, trellising or nutrients with others that provide them. Permaculture also combines aspects of farms which are usually isolated, such as greenhouses and chicken coops, to create a more efficient greenhouse that is warmed by the chickens’ body heat.

As a design theory, permaculture is all about designing things properly so that there is a place for everything and everything in its place, and so that unnecessary work is minimized. This means putting initial thought into plantings so that the most frequently  used and most labour intensive crops are located closest to the home, groundwater storage is done uphill so that gravity can be used to help irrigate, or using chickens and pigs to dig and till fields, allowing them to feed themselves in the process while reducing compaction from heavy machinery.

for more about permaculture check out www.permacultureprinciples.com

Square foot gardening: The least “unconventional” of the three, square foot gardening was developed in 1976, and is much more applicable to gardens than farms. The idea is that rather than planting in rows, if the garden is divided into small plots of one square foot (1’x1′). This approach is meant to waste much less space, be higher yielding, and reduce garden compaction as the square foot plots are organized into 4’x4′ beds, an area small enough that gardeners should be able to do all their work by reaching in from the perimeter. The number of vegetables to be planted in each plot is dependent on the relative size of the full-grown crops. Larger crops, such as peppers or broccoli will have only one plant per square foot, while crops that take up less ground area, such as spinach or carrots can have up to 9 or 16 plants respectively.

Besides the details of garden layout, square foot gardening practices are focussed on increasing yields from small spaces, techniques which can be used in conventional gardens as well. Trellising, for example, is a key aspect of gardening in small spaces. Bartholemew promotes trellising not only peas and beans, but larger crops: tomatoes,  zucchini, and even watermelons (provided the variety used doesn’t surpass 8 pounds). The idea of maximizing vertical space continues underground as well; square foot gardening also promotes digging extra deep beds for underground crops like leeks and potatoes and then gradually filling in soil as the shoots break through, as a way to force the plants to grow taller than they otherwise would and increase yields. In this high yielding intensive style of gardening, maintaining extremely healthy soil is of the utmost importance, so it is critical to add compost, other organic amendments and try to incorporate green manures or cover crops in the off season

<!–[if gte mso 9]> Normal 0 <![endif]–>

Leave a comment

Filed under Companion Planting, Composting, Pest Management, Plant Diseases, Soil Health, Weeds

Squirrels…the newest dirty word?

It's Coming!! Hide the Cucumbers!!!

The garden is thriving, with our first eggplants appearing and the tomatoes on the verge of being ready to harvest. I’ve been visiting some other community gardens in the city and I realized that while we did well this year in terms of filling up and expanding the garden we were perhaps too cautious, not putting our tomatoes and eggplants in until the last frost was definitely definitely past, which means some more adventurous gardeners have been harvesting for a couple of weeks now and we’re still waiting. That’s a lesson learned for next year, and something that will be easier once we have our greenhouse built. If we’re growing our own seedlings its not such a shame to lose a few to late frosts, and it won’t necessitate another trip (on the bus) to a garden centre. I love visiting other gardens to get ideas and creative inspiration for our own, and also just to find more beautiful green pockets in the city. The Toronto Community Garden Network’s site has a map of all the gardens in the city, many of which are close enough together that you can see several in one day on a walking or biking tour. I’d love to develop a guide for Toronto like the one they have in Vancouver, which is downladable here and shows bikeable routes between some of the citys most beautiful community garden sites.

One thing I need inspiration on these days is protecting the garden from squirrels. A lot of the solutions which might work in a backyard garden (hot pepper sprays, growing strong smelling plants like pennyroyal, or leaving bloodmeal or dog hair out to mimic predators) aren’t really an option for us. Since the garden is in a public park there are just SO MANY squirrels here.  There will always be ones brave enough to try. Since I’m getting tired of going to collect our donation for Second Harvest and seeing only sad, dangling cucumber tops, it’s time to get serious. I’m thinking our plan of attack needs to be threefold:

1) attaching some kind of nosemaker, bells or chimes to real problem areas, such as our cucumber patch. Once the squirrels get under the cucumber leaves they seem to feel pretty sheltered and take their time chewing away at everything in site. I’ve been working on removing leaves to make less of an enclave, but don’t want to damage the plant too much. Something that could make an unexpected noise when they approach the patch might be an excellent way to keep them on edge.

2) leave out something else for them to eat in a safer place. What do squirrels like? Besides cucumbers I mean. Nuts, berries, seeds. I’ve heard that setting out squirrel feeders or easy food sources will attract the squirrels more than something more difficult, like our crops. I’m skeptical because I feel like squirrels, with their penchant for taking 2 bites out of melons and leaving them, are eating our crops out of sport, not hunger! I’m also concerned that feeding them would just promote a population boom and leave us with an army of hungry baby squirrels. But I’ll do more research on this one.

3) fortification. This is what I’ve been working on, chickenwiring, netting, screening to my heart’s content. We’ve got our experimental squash box set up, and ready to be expanded to a second level. The idea behind this box is that we chicken wire the sides of it and direct the growing blossoms on the inside of a covered, chicken wire structure thereby allowing the squash to grow and get sunglight, but protecting just the fruit within the box. More on that later, once the squash get bigger and we see if the box collapses under its own weight. Another tactic I’m trying is protecting the individual plants. I’ve put chicken wire boxes around our melons, making a five sided cube with the bottom poking into the soil, which makes it easy to remove and adjust. I’ve also tried buildling an adjustable mesh wrap around some individual cucumbers, and my next plan is to try screen door mesh as it’s light permeable, pliable and inexpensive, but I don’t think squirrels can chew through it. This week is the experimental phase, I’ll report back in the next two weeks on how these protective measures are working.

Any tips or reccommendations from squirrel war survivors out there are welcome and encouraged!

Leave a comment

Filed under Animal Pests, Food Security, Garden Update, Pest Management

Crop rotation: or, why can’t I just plant tomatoes in the same spot every year??

As we’re getting into mid summer, some of the early season crops in the garden are coming into the last days of their productivity. Things like lettuce and peas have come to the end of their season and rather than leave those areas of the garden unproductive, we want to remove those plants and put in something else, that way we can grow as much food as possible in our small space. It’s important, however, to put in a new crop that will not deplete the same nutrients as the previous crop. For example, lettuce and spinach are both heavy nitrogen feeders, so it is best not to plant them one after the other. A better solution would be to plant a crop such as beans or peas, which return nitrogen to the soil in between, or to plant a crop that feeds less heavily, to allow the nitrogen to rebuild in the soil through adding compost.  A good crop rotation schedule will see heavy feeders followed by heavy givers, then by light feeders, and back to heavy feeders again. This can be done on a yearly basis for long season crops or throughout the season if you are practicing succession planting (growing more than one crop a year in the same space). A simple guideline to remember is that leafy and fruit crops tend to be heavy feeders, while root crops are lighter feeders. Rotating between these kinds of crops is also important because shallow rooted crops take nutrients from a different level of soil than deeply rooted ones do, and rotation allows both levels the time to rebuild nutrient levels.

Heavy Feeders: swiss chard, broccoli, cauliflower, kale , celery, corn, asparagus, cucumbers, melons, pumpkins, artichoke, lettuce, eggplant, peppers, and tomatoes

Light Feeders: beets, radishes, turnips, carrots, parsley, sweet potatoes, potatoes

Heavy Givers: beans, peas, alfalfa

Nutrient cycling is not the only reason to practice crop rotation. Moving crops around in your garden is also one of the best ways to prevent pest infestation. This is because after feeding on a crop, many pests lay eggs that overwinter in the soil. If the same crop is planted again in that location, the eggs hatch in spring and are presented with the tender leaves of their favourite crop, ready to be devoured! Crop rotation means that pests which overwinter will have to search for their preferred crop in the spring, giving your new plants a chance to establish and reducing the strength of the attack. For this reason it’s important to know the different families to which plants belong (see below). The Colorado Potato beetle will attack potatoes and eggplants, both members of the Nightshade family, so rotating them will not be an effective pest deterrent. Following eggplants with green beans and then carrots, however, would be a much better approach to deter pests, and will fortify the soil at the same time. Crop rotation must of course keep in mind the space and light requirements of each plant, and so certain crops, like sun-loving tomatoes can’t go just anywhere. Just do the best you can, and try to keep the principles of pest reduction and nutrient retention in mind when planning your garden!

Onion Family (Amaryllis Family, Amaryllidaceae): Garlic, onions, leeks, shallots.

Cabbage Family (Brassica, Cruciferae): Broccoli, Brussels sprouts, cabbage, cauliflower, Chinese cabbage, collards, cress, kale, kohlrabi, radishes, turnips.

Lettuce Family (Composite, Daisy Family, Asteraceae): Artichokes, chicory, endive, lettuce.

Beet Family (Goosefoot Family, Chenopodiaceae): Beets, spinach, Swiss chard.

Grass Family (Graminae): Grains–corn, oats, rye, wheat.

Bean Family (Legume, Leguminosae): Beans and peas, clover, vetch.

Tomato Family (Nightshade Family, Solanaceae): Eggplant, peppers, tomatoes, potatoes.

Squash Family (Cucurbitaceae): Cucumbers, melons, summer and winter squash, pumpkins, watermelon.

Carrot Family (Umbellifer Family, Umbelliferae): Carrots, celery, anise, coriander, dill, fennel, parsley.

1 Comment

Filed under Companion Planting, Pest Management, Soil Health

Identifying Garden Pests and Bugs in Ontario

One of the most popular pages on this blog continues to be the Weed identification page posted in May, so I decided it would be a good idea to follow it up with a pest ID post for those of you out there who are finding bugs and bite marks in your garden and wondering who did what.

I’ll start off with the good guys, the bugs we’re happy to have around and want to support. The most famous among these is the ladybug, whose adult form we can all recognize easily: red shell and black spots representing how old they are….or at least that’s what someone told me they meant in elementary school! Some important things to know about ladybugs though are:

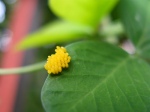
Ladybug Eggs

Their eggs look like this. If you see these eggs on the undersides of leaves, don’t destroy them, and in 2-5 days you’ll find….

Ladybug Larvae

…these guys! Now, even though they look like a troublemaking alligator-insect hybrid they are ladybug larvae, and are even more useful to have around than adult ladybugs because they have a voracious appetite for aphids.

 Attract ladybugs by planting pollen and nectar flowers, dill, dandelion, queen anne’s lace and yarrow are all favourites.

Some more bugs that look like pests but are actually beneficial predators and plants that specially attract some of them:

Soldier Beetle

Soldier Bugs

eat aphids, caterpillars, corn rootworms, grasshopper eggs, beetle larvae

attract with goldenrod, hydrangea, catnip, milkweed and wild parsley

Centipede

Centipedes

eat soil dwelling pests; slugs, worms and fly pupae

Lacewing

Lacewings

eat aphids, thrips, mealybugs, scales, moth eggs, caterpillars and mites

attract with pollen and nectar flowers and flowering weeds

Assassin Bug

Assassin Bugs

eat general pests, flies, mosquitoes, beetles, caterpillars

Now that you’re familiar with some of the beneficial insects in the garden, let’s discuss some more damaging ones. We’ve gone into flea beetles and leafminers  in  previous posts, and some methods to deal with them, though now that we’re further into the season I would definitely say they aren’t worth stressing about, they are an season pest who prey upon young leaves, but as long as the infestation isn’t severe enough to kill your seedlings they’re not worth much concern.

Aphids Everywhere!

Aphids are one of the top garden pests, they’re so small and so annoying and basically suck the life force right out of plants so are the bane of many a gardener’s existence. Luckily all that rage has led to a great deal of knowledge about these pests. They can be dealt with by attracting beneficial insects like those above, and by planting strongly scented deterrents such as anise, basil, chive, catnip, coriander, garlic, stinging nettle or trap crops like yellow nasturtium and sunflowers. If aphid infestation is severe, they can be killed by spraying with a strong, direct stream of water, or managed using a tomato leaf spray.

Imported Cabbageworm!

Imported Cabbageworms are the bane of my personal existence. I spent months in Vancouver picking them and their eggs off of cabbages, broccoli and cauliflower, and it made me determined to get them in their egg state as much as possible. These are the caterpillar form of those white moths you see everywhere in spring and summer, and they love members of the brassica family. They will lay their eggs within the grooves of the leaves and plant heads, and they hatch releasing caterpillars who chew large holes through the leaves. Beneficials are a great way to deal with these pests, and garlic or hot pepper sprays can also help. The best approach is just to be vigilant, however, keeping a close eye on the undersides of brassica leaves, and considering planting red or purple varieties to make the bugs easier to spot.

More pests posts will come soon! In the meanwhile, feel free to ask about any pest damage you’ve encountered, and I’ll try to get to the bottom of it!

2 Comments

Filed under Companion Planting, Pest Management

Teaching and learning about urban gardening: TGC’s Train the Trainer Manuals

Toronto Green Community has just made our Train the Trainer Workshop Series available FREE online. This workshop series provides instructions, worksheets, and powerpoint presentations to teach people how to lead workshops on ecological gardening in their own communities. The workshops are 2- 2.5 hours long and can be presented to large or small audiences. There are currently five modules: Ecological Gardening Basics, Native Plant Gardening, Troubleshooting Pests and Weeds Naturally, Water-Wise Gardening, and Natural Tree Care. More modules including Container Gardening and ESL in the Garden are currently under development.

Please feel free to use our Train the Trainer resources in your community to promote sustainable urban agriculture and report back to us with any feedback, we’re always looking to improve! Share these resources with other community groups in your neighbourhood and help us to green Toronto one garden at a time!

Direct Link:   http://torontogreen.ca/index.php?option=com_content&task=view&id=119&Itemid=163

Leave a comment

Filed under Companion Planting, Composting, Container Gardening, Heritage Plants, Pest Management, Plant ID, Soil Health, Toronto Organizations, Weeds

Dealing with leafminers and other troubleshooting

A few interesting problems have cropped up in the garden this week. Spring is getting warmer and most of our crops seem to be developing well, cucumbers and green beans are recovering from an initial bout of flea beetle attacks and forming strong true leaves, carrots, radishes and beets are all growing well and getting close to their harvest date. One minor glitch has been with our vertical potato planters – we’ve learned  how much of a difference using well-chitted potatoes can make.

Vertical Potato Planter

As you can see in the photo, the blue potatoes have been growing much more rapidly than the new and yukon potatoes we planted. This is due to the fact that the blue potatoes had many well established sprouts on them at the time of planting, while the others were just beginning to form eyes. In growing potatoes conventionally this wouldn’t be a serious problem, but it does complicate the vertical potato operation as we now have to cover the 8 inch tall blue potato plants while leaving the smaller seedlings exposed so they can continue to grow. This can be easily avoided though, just by ensuring that your seed potatoes are evenly chitted at the time of planting, or by staggering your planting and putting the more advanced spuds in later on.

The other problematic area in the garden has been our greens beds. Our spinach plantings have shown unexceptional growth, many of the seedlings in the middle of the row failing to germinate or not growing beyond their first true leaves. It’s unclear if this is because of a problem with the seeds we used, which were a few years old, or if it is as a result of water/temperature stress around the time of planting, we went through some pretty inconsistent weather at the beginning of the season. Either way, the plants failed to develop well and now, with the increased daylight hours and heat of Spring, the spinach plants have begun to bolt – that is form flowers and seeds, a process which causes the leaves to become bitter. We will have to pull it up for now, harvest what we can, and plant another summer hardy green like chard in its place, replanting spinach in the cooler weather of the fall.

Leafminer damage on spinach

Another problem we are having which has affected our spinach and chard appears to be leafminers. These pests feed on leaf tissue between upper and lower leaf surfaces creating tunnels or white blotches within the leaves. Plants that have been damaged by leafminers can still be eaten if the damaged areas are removed, but it defintely makes them a lot less appetizing! The best ways to deal with leafminers are as follows:

Attract Beneficial Insects: Plant crops such as dill, tansy, buckwheat and yarrow to attract parasitic wasps that prey on leafminers

Row Covers: cover seeded areas young plants with row covers to prevent pests from colonizing plants.

Handpicking: Remove damaged leaves to prevent spreading. Do not compost leaves, throw them in the garbage to prevent leafminers from repopulating. Be sure not to remove so  many leaves that the plant becomes unable to photosynthesize.

Weeding: Remove neaby bigweed, plantain, chickweed and lamb’s-quarters as they are leafminer host plants.

1 Comment

Filed under Container Gardening, Garden Update, Pest Management, Weeds

Natural pest sprays for your garden

Last week at the garden we talked some more about natural pest controls. A learning experience I’ve had with the garden this year is that it’s important to get your pest repellent plants in as early as possible, ideally before you even begin planting anything else, if weather allows. Nasturtiums aren’t going to do much good in terms of attracting aphids away from your plants if they haven’t flowered when your plants are at their most appetizing. As many pests attach brand new plants which have only a few leaves, sometimes you may need to protect them with things other than preventative crops at the beginning of their development, until your marigolds and pennyroyal plants have become big enough to do the work themselves.

This is why natural pest sprays can be very useful. Of course, as we learned from discussing Integrated Pest Management before (here) an important part of pest management is establishing thresholds. It is inevitable that some crops will be damaged by pests, but if the leaf damage doesn’t impact overall development or if you’re losing less than 5% of your harvest it’s nothing worth spending too much time on. These pest sprays are great,however, because they can be made from household ingredients when and if you need them, and they are non toxic, so even if you are a little trigger happy with your spray bottle there will be no serious harm done.

Many of the ingredients recur in different sprays for different purposes, there are two major underlying principles in these sprays:  using scents that disorient pests and using ingredients that actually kill pests. Many strong scented ingredients such as cayenne pepper, onion, mustard and garlic are used in natural pest repellents. These are effective because they mask the smell of the pests’ preferred plants. Scent is one of the major ways pests find the crops they like, and if they are overwhelmed by onion or cayenne they will search elsewhere. Strong scents overwhelm and repel animals like cats and squirrels as well, which is why these same ingredients are found in those sprays as well.

The Canadian Organic Growers Toronto website provides a great flyer with sprays for a variety of purposes, repelling pests but also fighting diseases as well here. I haven’t tried all of these out, so I can’t vouch for them yet, but as problems arise in the garden I will be experimenting with them throughout the season and reporting back. Take a look at their suggestions, and please post any feedback you have on their pest control suggestions. Below is the  basic pest spray recipe we used in the garden, I will let you know if it seems to be a success!

GENERAL ALL-PURPOSE INSECT RECIPE
This spray makes use of the repellent properties of garlic, onion
and hot peppers. The soap makes it cling to plant leaves.
1 garlic bulb
1 small onion
1 tablespoon cayenne pepper
1 quart water
1 tablespoon liquid soap (hand soap not dish
detergent)
Chop or grind garlic and onion, add cayenne and mix with water.
Let steep for one hour, then add liquid soap. Store in a covered
jar in the refrigerator for up to one week.

Leave a comment

Filed under Pest Management, Toronto Organizations

IPM: It’s Pretty Magical

So I think I love the government of Ontario. Or at least I love their ability to create gardening websites! When I first encountered the Ontario Weeds website while working on a previous post , my mind was pretty much blown. Now it seems they’ve done it again with Ontario CropIPM http://www.omafra.gov.on.ca/IPM/english/index.html . IPM, or Integrated Pest Management, is the an ecological growing practice which deals with pests through careful monitoring, identification, and prevention techniques so as to minimize the need for chemical intervention. It is a fascinating and adaptable system which is constantly growing and improving.

The Ontario CropIPM page, though intended for farmers, can be extremely useful for the home gardener who is interested in learning and implementing IPM. The site allows you to choose what crop you’re interested in by family name, and shows clickthrough images of the major diseases, insects, and weeds that affect that crop, with tips for identifying and dealing with the specific maladies. Some crops are sorted into families which suffer from common issues, brassicas (broccoli, cauliflower, cabbage, brussels sprouts), Cucurbits (squash, melon, cucumber), while onions, peppers, strawberries, sweet corn, and tomatoes have their own sections. New crops will continue to be added, though even if your specific crop isn’t yet on the site, chances are the disease/pest affecting it will be.

To top it off, there’s a whole section dedicated to soil assessment and mitigation and an excellent identification key which asks a series of questions to identify plant problems you haven’t been able to solve yourself. Definitely a site worth checking out for anyone who grows food crops and is interested in maintaining their crops organically, and as they add more details it will only become better and better. This is honestly not an ad for the Government of Ontario, I just get really excited to see well done extension services being provided by the government in a way that’s accessible to non-experts such as myself! Happy Gardening!!

1 Comment

Filed under Pest Management, Weeds